Vodka
How to Make Vodka From Potatoes (Our Step-By-Step Guide!)
Vodka is one of the most well-known and accessible alcoholic beverages worldwide.
Historically, vodka was made from potatoes since that was the cheapest and most readily available starch source.. especially in Russia! Distilling vodka at home was common in many households as the ingredients are simple and widely available.
Nowadays, Vodka is easily mass-produced and typically made from starches like corn, wheat, or milk whey waste from the cheese-making process. It’s actually quite hard to find authentic ‘potato vodka’!
If you are getting into the distilling hobby and are planning to distill your own vodka soon, an old-fashioned potato Vodka is a great project. Here are the steps and fundamental knowledge to know how to make vodka from potatoes.
Table of Contents
What sort of potatoes are best for making vodka?
Potatoes are abundant sources of starch that can be broken down into sugars and fermented into liquor. Potatoes are naturally abundant in starch which is an excellent source of fermentable sugar. To make potato vodka, remember that the best potatoes to use are the ones that have a higher starch percentage.
Typically, the potatoes which have higher starch contents are the ones that are fluffy and floury on the inside. A common type of potato you can use is roasting potatoes as they could be crispy on the outside yet still fluffy in the middle.
Step 1. Making the wash
To break down the starch from the potatoes, there should also be at least some amount of malted grains. The malted grains like corn, rye, and wheat will act as the source for enzymes that break down starches into fermentable sugars.
To start converting the starch to sugar, you have to obtain the starch from the potatoes first. To do this you have to make a mash. Making a mash begins with peeling the potatoes and boiling them for at least 20 minutes or until they are ready to mash.
After you mash them, add more water and the malted barley and keep the potatoes at 150F for at least an hour.
You need malted barley because it contains an enzyme called amylase. This enzyme is critical as it breaks down starch (a polysaccharide) into sugars (mono or disaccarides). You want a pale malt or base malt as these contain the maximum amount of amylase – unlike heavily roasted malts which kills the enzyme.
If you don’t have malt or don’t want to add wheat or barley, you can actually buy vials of amylase from most home brew stores (although this can get pretty pricey). We actually found the best value for money is to get dried amylase in 1lb bags direct from Amazon, like this one
After you’ve finished these steps, chill your resulting work to room temperature and pitch the yeast. For the potato-based mash, the best yeasts to use are the baker’s or distiller’s yeast.
Keep your mash in a space no more than 77F for at least a week. This time allows the mash to ferment. The resulting product of the fermentation is the wash.
The term wash refers to the fermented product of your mash. It is also the same substance that will need to be put through your still. The size of your wash largely depends on the size of your still.
Step 2. Fermentation
Fermentation is a crucial step to developing alcohol. Fermenting a mash for potato vodka isn’t any different from fermenting other alcoholic beverages such as whiskey, and bourbon, After you’ve pitched the yeast, the fermentation later takes place and liquor will be produced from the sugar.
For potato vodka, fermentation takes at least 7 days. To know if the fermentation is complete, you can test the specific gravity. Normally, a fermented vodka will have a final gravity of 1.015.
Fermentation allows us to create a variety of alcoholic solutions. However, due to the limitation of yeast, it is not possible to reach 18%abv. This alcoholic percentage suits wine and beer very well. For spirits like vodka, the fermented liquid, also called the wash, needs to be distilled to reach a higher alcoholic percentage.
This is for the reason that distillation increases the percentage of alcohol content. This also allows separating the alcohol from water and other components in the wash purifying the vodka further.
Step 3. Stripping run (1st distillation)
As you move forward from the fermentation, your wash is now ready for distillation. The wash is a soupy and grainy mixture. Some people opt to strain this mixture resulting in low wines. But for vodka, the grains are not strained as they add more flavor to the drink.
The first distillation is known as the ‘Run’. It is also referred to as a stripping run because this process concentrates on stripping all the alcohol from the wash.
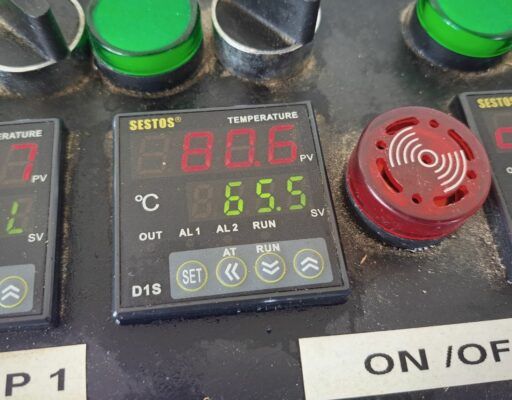
We begin by heating the still between 167F to 201.2F to concentrate and collect all the alcohol. Be patient as the heating time typically takes a couple of hours depending on the size of your wash, If you rush the distillation process can burn the sediments in the kettle and affect the finished product.
Start Running your cooling water after a good amount of boiling time or before any vapor starts being produced to avoid dangerous situations. When the vapor starts, it is now time to collect the distillate. Stripping Run doesn’t require you to make any cuts at different temperatures. Collect all the distillate until the temperature reaches 207F – 208F.
Lastly, turn off the heat but do not turn off the cooling water as some vapor might still be present. This vapor is still very hot and above the boiling point of ethanol, it will continue to rise and make its way to the condenser until there is no vapor produced.
Step 4. Reflux run (2nd distillation)
Reflux run allows us to produce clearer products and increases the alcohol content. This term is basically just another term for the repeated condensing of the vapors that rise in a distillation column and are then returned to the system.
The process takes place in a tall column where components of varying boiling points separate out naturally. Just like in pot distilling, this method allows the lower boiling point liquids to boil more rapidly than those with higher boiling points. Nonetheless, since it uses columns, we are able to separate all the components in the solution into individual parts and fraction them.
As the vapor travels to the column and rises, it will eventually decrease in heat. When a component falls below the boiling point, it condenses and the liquid will fall back to the column. The process is called ‘refluxing’. This process will continue until you achieve the highly purified product from the solution in the kettle.
The goal in the reflux run is to collect only the pure vapor and condense it. This will leave the water and other by-products left behind.
Step 5. Cutting and bottling the vodka
Cutting is the process of switching containers that are collecting the distillate coming out of the condenser. You basically cut the alcohol streaming down as you switch to other containers. But cutting isn’t simply just changing the containers, it also requires timing.
As you distill your wash and temperature rises to 175F to 176F, you will see that the distillate will start dropping and your container is slowly catching it. These first distillates are called the foreshots. Foreshots are the first approximately 5% of your run. This substance contains methanol which is poisonous and extremely harmful to the body so it’s best to discard and throw them away. Remember to label the bottle in order to avoid confusion and accidents.
After the foreshots, you have to cut, change your container, and start collecting the heads. The heads are the next 30% of your distillate. It is filled with volatile alcohols. One particular volatile alcohol in this distillate is acetone. It has a solvent-like smell but is safe to drink. Drinking the heads will not cause any harm to your body but will result in an extreme hangover. Continue collecting the heads until the temperature reaches 195F.
Following the heads are the hearts. When the temperature reaches 195F, cut from it and again label your bottles. The next 30% from this temperature is the sweet spot of the vodka. The solvent smell from the acetone is now eliminated and the sweet smell of ethanol becomes more powerful. It is also the time for tasting. Continue to collect the hearts until the temperature reaches 202F.
Your last cut should be for collecting the tails. This is the final 35% of your vodka run. It contains protein and carbohydrates from the wash that you don’t want in the finished product. You can discard them but you can also run them again as their own to pull out a bit more alcohol. The most effective way to identify tails is the decreased sweetness as ethanol concentrations decrease. The point of collecting tails is to not waste some alcohol. Just continue collecting the tails until the temperature rises to 207-208F or until taste and smell reveal little to no alcohol.


It’s interesting article and I’m willingly to learn more about vodka distillation from your side. Since thank you for article. I much appreciated.
Thank you I have a 26 gal still how many potatoes should I use in the first round?
Thi is a pretty open ended question. I’d estimate you’ll need around 100lb of potatos to make a ~25gal wash, assuming all goes well with conversion.
I’m assuming 6 Row malted barley is best for the diastatic power but at what percentage of the bill?
That’s correct. As a rule of thumb I’d go with minimum of 20% by weight pale malt to other grists. If you want to do the math, you need at least 30 °Lintner of diastatic power across your whole grain bill but that also assumes your mash goes perfectly and you don’t kill off any of the emzymes.