Distilling, Distilling 101, Distilling Hardware
Vevor Still Instructions (A Step-By-Step Guide)
The Vevor still is a fantastic entry-level kit that produces high-quality spirits, making it perfect for novices and those on a budget.
To use:
- Assemble the still
- Fill the boiler
- Turn on your heat source.
- Monitor the temperature.
- Monitor the ABV
- Discard foreshots and heads
- Collect the hearts
- Clean and Store
The still comes in different models, with each requiring a slightly different setup and operation. Carry on reading to get started with yours.
Table of Contents
Vevor Still Instructions: A Basic Overview
The Vevor still is pretty easy to use. It works similarly to regular stills, only the condenser gets placed on top of the boiler. Here’s a quick rundown on using the still.
- Assemble the still: Connect the hoses and fittings to the still and attach the condenser to the top of the boiler.
- Fill the boiler: Fill the boiler with your wash; make sure you leave enough headspace for the vapors to expand.
- Turn on your heat source: Place the still on the stove and turn it on.
- Monitor the temperature: Use the thermometer to monitor the temperature of the wash. Adjust the heat as necessary.
- Monitor the ABV: Use a proofing parrot to monitor the alcohol by volume (ABV) of the distillate as it exits the still.
- Discard foreshots and heads: As the distillation process progresses, separate the foreshots and heads from the hearts.
- Collect the hearts: Collect the hearts. As soon you reach the tails or the still hits 205-208°F (96-97°C), turn off the heat source.
- Clean: Once cooled, wash all the components of the still using warm water and detergent, and store it.
- Store the hearts: Once you have collected the hearts, store them in glass containers or age them as desired.
The Different Models Of Stills And Accessories
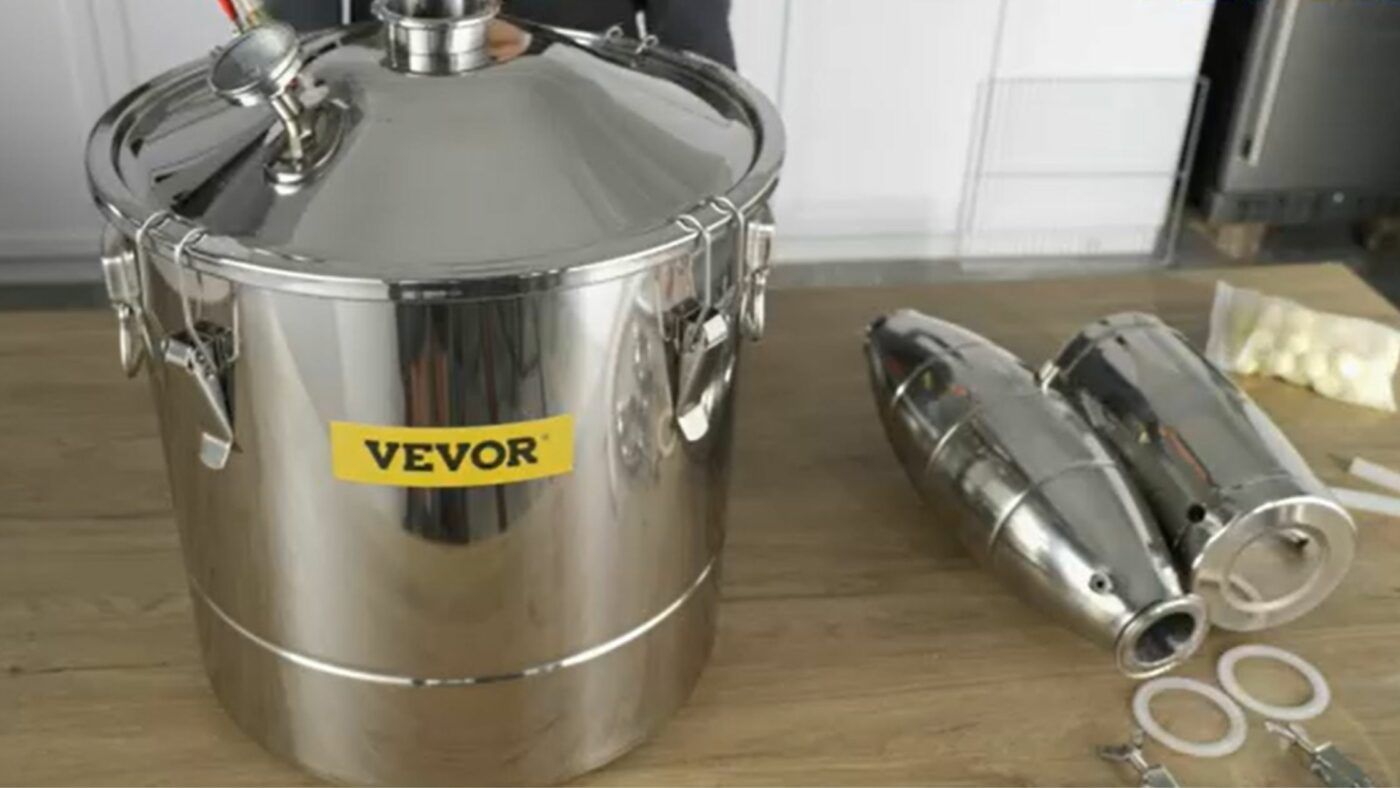
Vevor offers several models of stills. You can use them on various heat sources–gas stoves, firewood, and electric stoves. They have a capacity of between 3 and 13.2 gallons (11-50 liters) and can make whiskey, rum, vodka, tequila, and gin. The main ones are:
Basic Pot Still
The basic still uses an open cooling method with a copper coil for rapid cooling. It has a dual-display thermometer that helps you monitor and read the temperature of your distillation in both Celsius and Fahrenheit.
What does the kit include?
- Boiler
- Condenser keg
- Set of Accessories
- Manual
- Thermometer
- Air evacuation valve
Stills with Thumper Keg
The still with a thumper keg works similarly to the basic pot still, only it comes with a circulating water pump to save cooling water. The thermometer has a dual display of Celsius and Fahrenheit–allowing you to monitor the temperature during the distillation process.
Included in the package:
- Boiler
- Condenser keg
- Thumper keg
- Water Pump
- Set of Accessories
- Manual
- Thermometer
- Air evacuation valve
Still with Rectification Tower
Rectification tower stills have a selective heating and cooling process. The rectifying tower comes with ceramic balls to filter out high-boiling impurities, leading to a much purer spirit. They also have stainless steel coiled tubes that provide efficient condensation treatment and a water-circulating pump to speed the cooling process.
The kit includes:
- Boiler
- Condenser keg
- Pack of Ceramic balls
- 2 x Gauze bags
- Manual
- Thermometer
- Air evacuation valve
- Vinometer kit
What You Can Make In A Vevor Still
Vevor models are versatile. They’re equipped with unique features that help them produce a lot of your favorite spirits, and some–those with rectification towers–can make seasoners like vinegar and soy sauce. Depending on the model you use, here’s what you can make in a Vevor still.
Whiskey
The basic pot still and that with a thumper keg are suitable for making whiskey. The thumper keg acts as a second distillation chamber to produce a smoother, higher-quality whiskey.
Rum
To make rum, you can use the basic pot still and the still with a thumper keg.
Vodka
The still with a rectification tower is ideal for making vodka because it allows for multiple distillations, resulting in a high-quality, pure spirit.
Tequila
You can use the basic pot still and the one with a thumper keg to make tequila.
Gin
To make gin, the still with a rectification tower is ideal because it allows for the addition of botanicals.
First, Fermenting Your Wash
Depending on the temperature in your environment, it can take up to 15 days for your wash to ferment. You can use any ingredients of your choice to prepare the wash. Once complete, follow the steps below to ferment it.
- Pour the wash into the fermenter.
- Dissolve the yeast as instructed on the packaging.
- Pitch the yeast and mix well.
- Place the fermenter in a room with temperatures of 18-25℃ (64-77℉). Place an airlock on your fermenter to monitor the fermentation process.
- When the airlock stops bubbling, take a gravity reading. If it reads between or below one, it’s ready to hit the still.
Tip: You can ferment your wash in the still. The kit comes with an airlock, so you can place the thermometer in one hole and the airlock in the other and use it as a stainless steel fermenter. Before distilling–to prevent scorching–siphon the wash to a clean container, clean the boiler, and add the wash back in. Then run your still!
Assuming you’ve cleared your still of any contaminants and ran a sacrificial run, follow the steps below to use it.
Instructions: How To Use A Vevor Pot Still With Thumper
Set Up
- Assemble the unit according to the instructions provided.
- Place the still on a stable and heat-resistant surface.
- Connect the condenser to a water source.
- Fill the kettle with the wash.
- Seal the lid tightly.
- Connect the condenser to the top of the still.
- Ensure all connections are tight and secure.
Hint: You can seal the connections with pipe threading tape to prevent any potential leaks.
Operation
Now that you’ve set up the still correctly, it’s time to operate it. Follow the steps below.
- Pour some alcohol into the bottom of your thumper. You can add fruit, spices, and herbs if you wish to add flavor to your spirit.
- Run your still.
- Make cuts, separating the foreshots and heads from the hearts.
- Once complete, turn off the heat.
Cleaning and packing
Allow the still to cool completely and then disconnect the hoses and fittings. Using detergent and warm water, wash all the components and give them a good rinse. Dry well, place the removable parts into the boiler, and store.
Instructions: How To Use A Vevor Still With Rectification Tower
Set Up
- Assemble the unit according to the instructions provided.
- Place the still on a stable and heat-resistant surface.
- Connect the condenser to a water source.
- Fill the fermenter with the wash.
- Seal the lid tightly.
- Connect the condenser and rectification tower to the top of the still.
Operation
- Run your still.
- Make cuts, separating the foreshots and heads from the hearts.
- Once complete, turn off the heat.
Cleaning and packing
Allow the still to cool completely and then disconnect the hoses and fittings. Using detergent and warm water, wash all the components and give them a good rinse. Dry well, place the removable parts into the boiler, and store.
5 Tips To Get The Most Out Of Your Vevor Still
- Use an induction hot plate for better control
- Clarify your wash before distilling
- Grab a proofing parrot to monitor your ABV
- Always perform a stripping run
- Don’t overfill the boiler!
Use an induction hot plate for better control
Temperature control is crucial for distillation, and induction cooktops offer precise heat control. The response to a turn of the dial is almost immediate, allowing you to make quick adjustments. Also, there are no open flames. This reduces the risk of accidents and provides an extra layer of safety, especially because you’re dealing with flammable liquids.
Clarify your wash before distilling
Clarifying reduces the potential of any scorched substances during distillation. Even when distilling a sugar wash, best to clarify it because the yeast sediments can burn.
Grab a proofing parrot to monitor your ABV
Using a proofing parrot allows you to monitor the ABV of the spirit in real-time to make precise cuts. You can track any adjustments you may need to make when the distillation process is complete.
Always perform a stripping run
Stripping runs help remove unwanted compounds from your products. Another reason we recommend you perform a stripping run is to:
- Produce a flavorful, smooth alcohol.
- Reduce the distillation time when you do a stripping run.
Don’t overfill the boiler!
Leaving some headspace in your boiler ensures any vapors that might foam have enough room to break down air bubbles, liquefy, and collapse to the bottom of the still. This prevents puking, which can contaminate the distillate.
Vevor Still Instructions Frequently Asked Questions
Q. What temperature should a still run at?
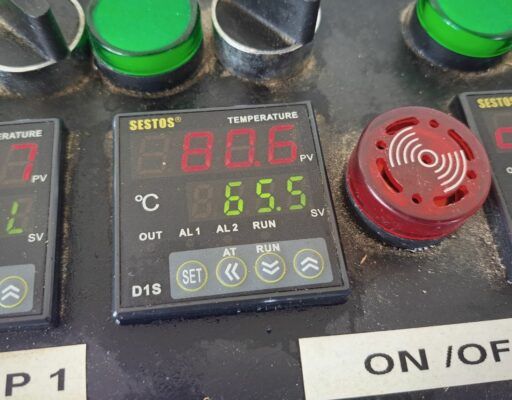
The best temperature to run your still is 80°C (176°F).
Q. How do you know when to stop distilling?
The simplest way to know when to stop distilling is by taste and smell. As soon as you pick up a funky, damp socks type of smell, you’ve reached the tails, and the distillation is complete. But this is easier said than done if you’re a beginner.
For a stripping run, When you reach 205-208°F (96-97°C) and the alcometer drops to about 20% ABV, you can stop distilling.
If it’s a spirits run you’re right it’s not so obvious. I’d suggest collecting in cuts jars and collecting past your tails point so you can make your cuts at a later time. Regardless, you’ll probably want to stop distilling around the 40- 0% ABV mark
Q. How fast should moonshine drip?
Your moonshine should have a steady drip of 1-2 drops every second or two.
Q. Can you stop distilling and start again?
You can stop distilling and start again. When restarting, ensure you make foreshot and head cuts again.
Q. How long after distilling can you drink?
You can drink your spirit 24 hours after distilling. The volatile compounds have simmered down and the flavors have blended to create a smooth drink. But, if you want a more pronounced drink, we recommend waiting a month or more.
Q. How long can a mash sit before distilling?
The mash can sit for up to a month before distilling, ensure the fermenter is airtight to ward off any bacteria.
Q. How much alcohol do you get from a 25-liter wash?
A 25-liter (6.6 gallons) wash produces 8 liters (2 gallons) of alcohol.
Q. How do you know when the heads are done?
When your thermometer reaches 176-196°F (80-91°C), or your alcometer reads 80-82% ABV, the heads are done.
Q. What is the distiller’s rule of thumb?
The distiller’s rule of thumb is to throw away the first 50ml you collect from a reflux still or 100-200ml from a pot still.
Q. Do you have to clear your mash before distilling?
You have to clear your wash before distilling. Doing so removes any sediments that might scorch at the bottom of the boiler–preventing waste and nasty flavors from transferring into your final product.
Conclusion
Though basic, a Vevor still can help you create a decent spirit. You can conjure flavored spirits like whiskey, rum, and tequila, or create neutral spirits like vodka to make liqueurs or gin. It works similarly to moderately priced to high-end stills. This makes it a great alternative for those who want to dip their toes in the craft or looking for a budget-friendly alternative.





hey I got a 30 liter vevor still it has an open cooling tower on top some new design is there any special things I should know
I’d like to question the 20% ABV before stopping to distill. Multiple sources say that one should stop distilling at 42% ABV. What am I missing?
Thats a good questions and needs some clarification. I meant for a stripping run i’d stop at 20% ABV. If its a spirits run you’re right, 40% is probably better I’d suggest taking off in cuts jars so you can make your cuts at a later time. I’ll update the article to suit.
I have a still with a Rectification tower does the tower need to be at 80 deg c or the pit?
Hi peter, not quite sure i understand your question?
pot
I have a Vervor, similar to a T500. It has a glass top with a 2″ center hole. I want to be able to use a reflux top to run liquor. Can the glass support the weight on top? The after market domes are differently sized to be of help. Any options short of fabrication?
Hi Mark, can you share a photo? I’m not familiar with a Vevor still with a glass top. In short, i think you’re probably going to have to fabricate something but it night not be too hard. Happy to help with idea 🙂